
This is shortly after I first put it all together. It's complete and ride-able, but obviously in need of a paint job.
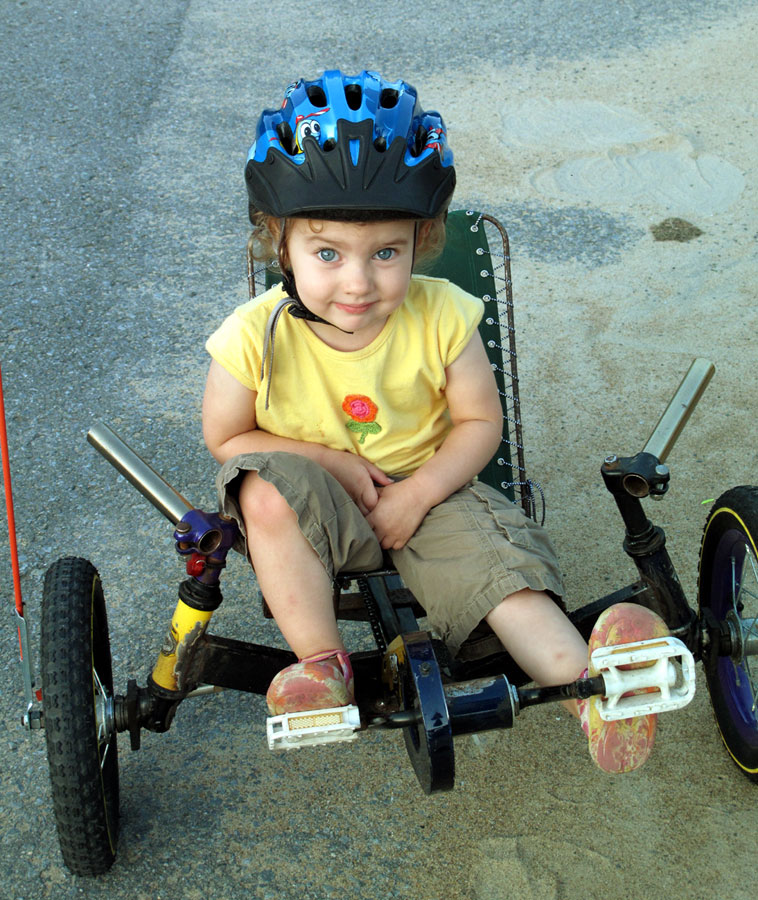
Here is it fully assembled after the paint job. My daughter picked the blue colour for the frame, which turned out to be challenging to photograph indoors. It looks great outside though.

The design of the trike seems to have generated a bit on interest, so here are a few photos of various parts of the trike. I took these while I was re-assembling it after painting it, so I don't have photos of all the build details, but there is probably enough to get you started on building one of your own.
Here's the frame. I built it using bits and pieces of three 12" kids bikes and a part of a discarded desk.


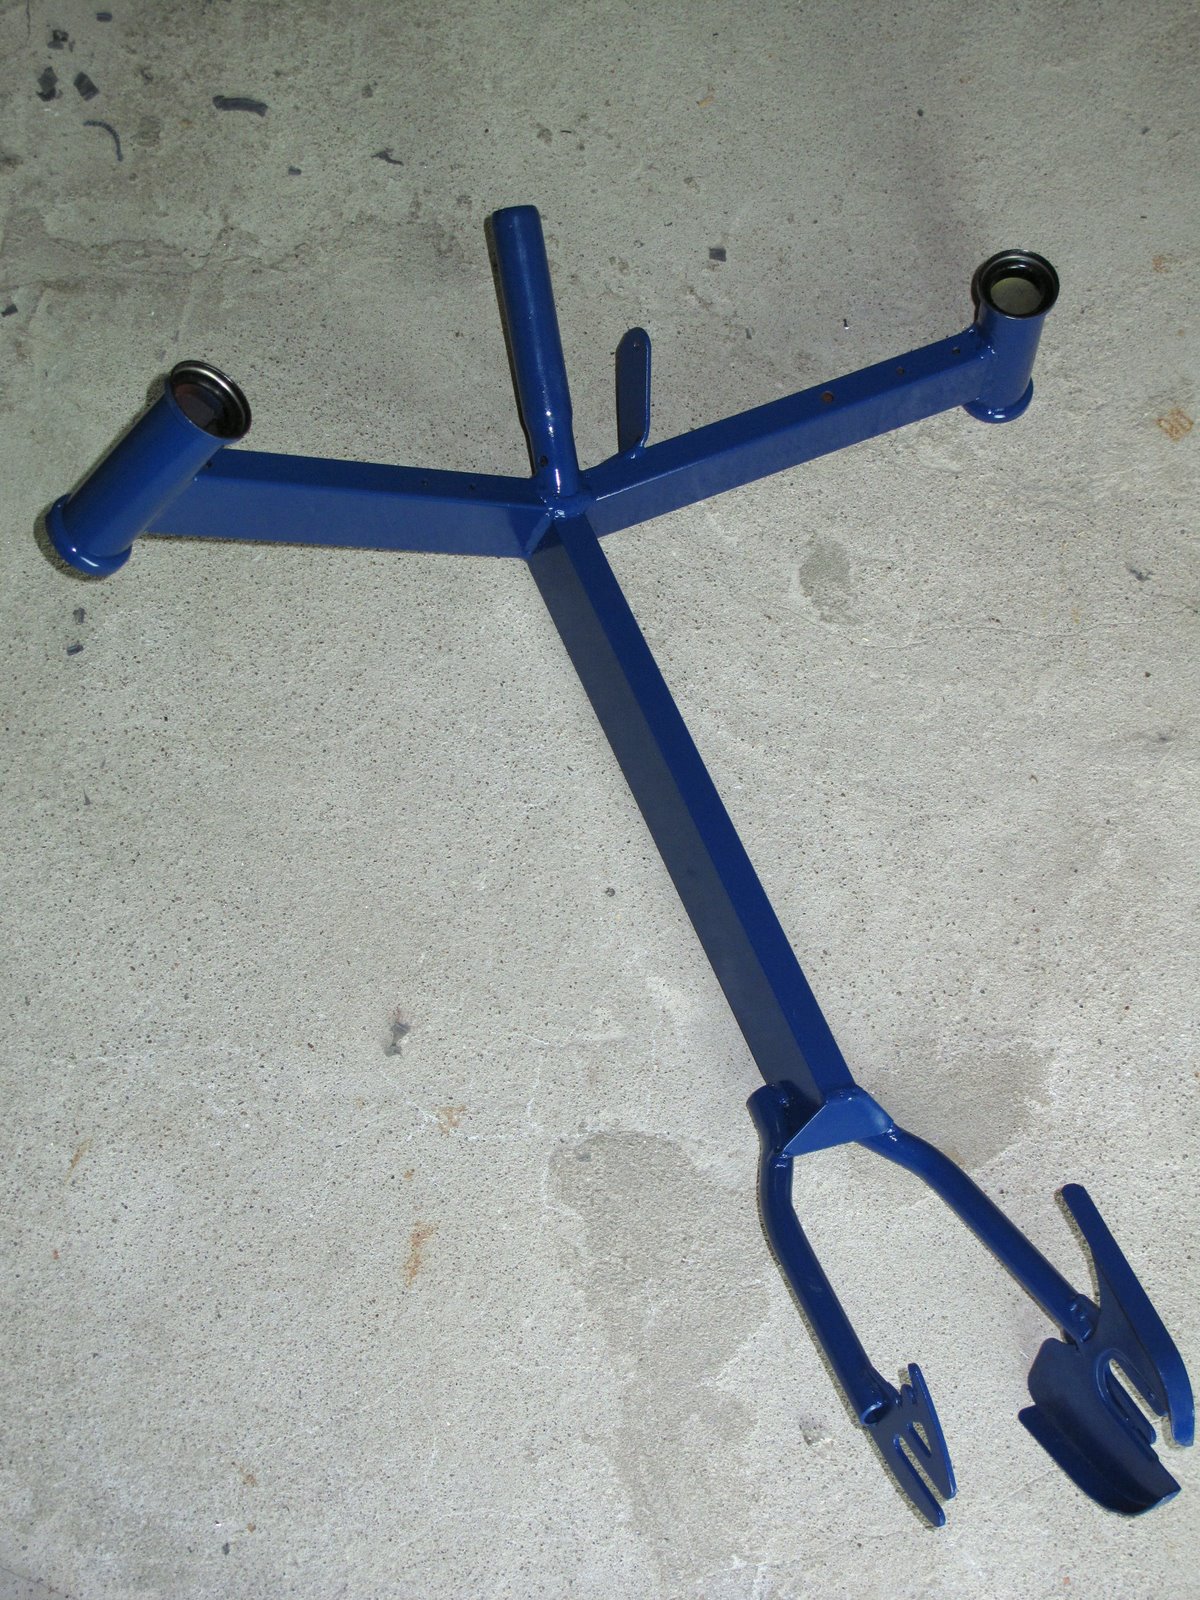
I made use of the existing handlebar stems for steering.

This is a picture of the steering tube. I cut almost all of the front forks off the kids bike and welded on a steering arm and wheel mounting plate. There is a left and a right version of this part.

The next two photos show the rim and part of the bearing assembly. I figured out a way to re-jig the coaster brake parts to support the axle to allow it to be mounted from one side only. supporting the wheels from one side is one of the big challenges with trikes. It just happened to work out that the existing parts could be used to create a sufficiently strong structure.


 I used off-the-shelf ball joint assemblies for the steering tie-rod. These parts are the only commercial parts I had to buy for this project.
Here are two snapshots of the steering linkage on the frame. The first image shows the steering facing forward, and the second shows it turned. This demonstrates the steering geometry and the ackerman steering effect. In the first image the axles are parallel and in the second, the inner axle is turned in more than the outer, which is required to prevent the wheels from scrubbing while turning.


This is a closeup of the bearing assembly attached to the steering knuckle.
 Here is the frame with the wheels mounted. There are still several components to be mounted, including seat components, bottom bracket, chain, and handlebars.
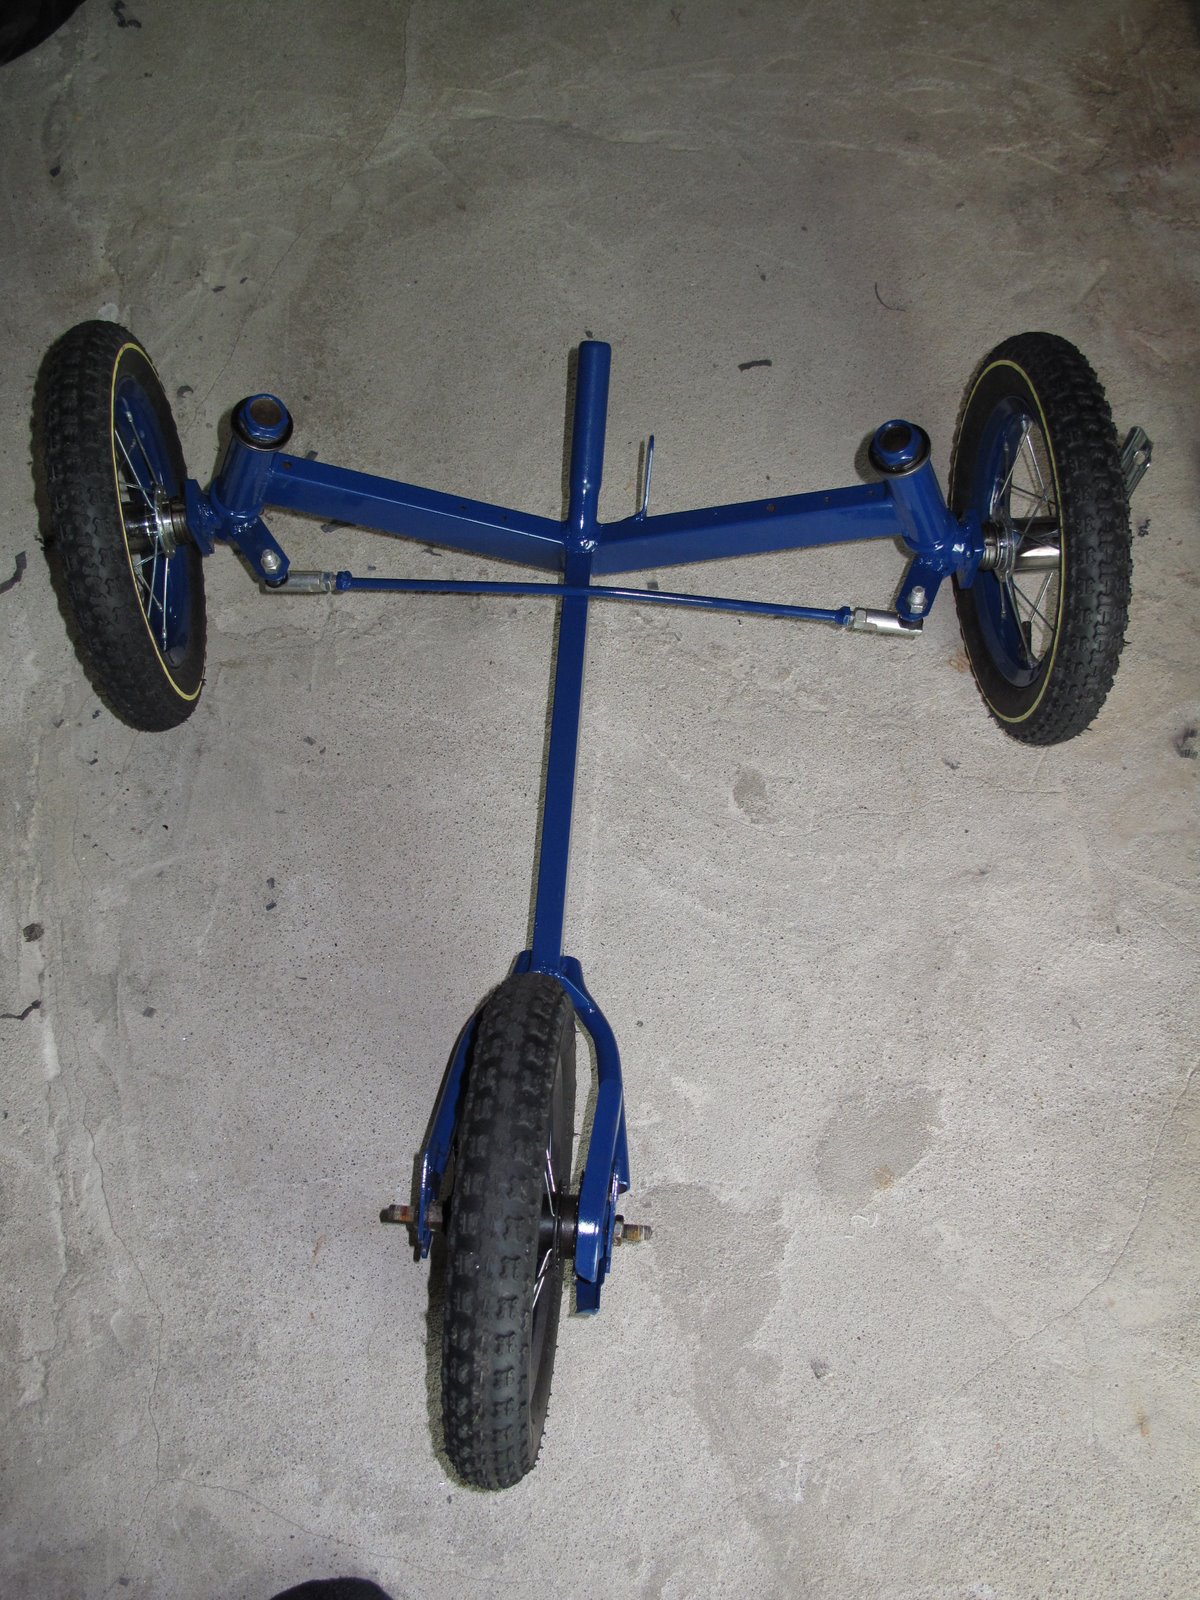
Here's a shot showing a few of the parts remaining to be mounted.

Here is the frame with most of the parts mounted. The only thing left to install is the seat webbing. The handlebars are sections of discarded floor lamp column.

Another view of the frame minus seat.
 Side view of the frame minus seat webbing.
Top view minus seat webbing.
